

Overview
How to hold a Virtual Parents Evening using Microsoft Teams.
Procedure
Setting up Microsoft Bookings
1. Firstly, you’ll need to create/set up Microsoft Bookings.
2. Sign into your Office 365 account on a web browser – https://login.microsoftonline.com
3. Once signed in, click on All Apps in the bottom left hand corner below some of the Office 365 the app icons.
4. Now you have all of the Office 365 applications in front of you, select Bookings.
5. Microsoft Bookings will open a welcome page, select Get it now.
6. On the next window that pops up on the screen, select Add a booking calendar.
7. Next you will be asking to input your organisation name e.g. your school name and will ask for the organisation type e.g. Education/School.
8. On completion of the above step, your site will take a few moments to build, once this is complete you are ready to use Microsoft Bookings.
Creating and Adding Staff to the Staff List
1. Launch Microsoft Bookings through Office 365.
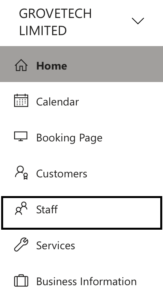
2. On the menu on the left hand side of the screen, select the Staff option.
3. Now, you are on the Staff menu screen, navigate to the top of this screen and select Add Staff.
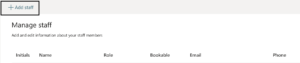
4. You can now add their name, initials, email address and phone number, along with selecting a colour for them if you desire.
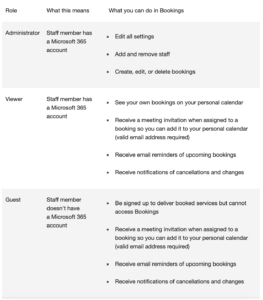
5. Now you have to set the access level that the staff member will have to the Bookings service, the choices are below:
6. Select Save when complete.
7. Repeat the above steps for each staff member.
Creating a booking service
1. Go to the Services Page on the left taskbar and select Add a service.
2. Now you will need to fill in the appropriate fields in order to create your booking service:
Service name – Enter the name of your service. This is the name that will appear in the drop-down menu on the Calendar page and also will appear when anyone manually adds an appointment on the Calendar page.
Description – The description you enter is what will appear when a user clicks the information icon on the Self-service page.
Location – This location is what will be displayed on confirmation and reminder emails for both staff and customers, and it will be displayed on the calendar event created for the booking.
Add online meeting – There is two choices for this, if it is kept on, when a parent books a meeting time it SHOULD generate a Microsoft Teams meeting. If this doesn’t work or you aren’t trusting of the system you can manually set up a Microsoft Teams meeting once you have Parents Evening bookings using this guide: https://kb.grovetech.org/index.php/bwl-knowledge-base/office/kb0106/
Duration – This is how long meetings will be booked for and the full appointment time will be blocked on the staff member’s calendar.
Buffer time – Enabling this setting allows for the addition of extra time to a staff member’s calendar every time an appointment is booked. The time will be blocked on a staff member’s calendar and impact free/busy information. This means if an appointment ends at 3:00 pm and 10 minutes of buffer time has been added to the end of the meeting, the staff member’s calendar will show as busy and non-bookable until 3:10pm. This is perfect to add on to appointments in case of over-running or to prepare notes for the next appointment.
Let the customer manage their booking – This setting determines whether or not the customer can reschedule or cancel their booking, provided it was booked through the Calendar tab on the Bookings Web app.
Maximum attendees per event – This setting should be set so just one attendee can join the appointment with the teacher unless there is specific requirements for an appointment.
Price – This setting will need to be set to £0 or not set at all.
Reminders and Confirmation Emails – Both types of emails are sent out to parents, staff members, or both, at a specified time period before the appointment. Multiple messages can be created for each appointment, according to your preference. The default confirmation and reminder emails include basic information about the appointment, such as the parents name, staff member’s name, the service or appointment booked, and the time of the appointment. For online meetings, a link to join will also be included. The parent can also get text reminders about the appointment but only if they opt-in.
Staff – Selecting this checkbox allows customers or clients to choose a specific staff member for their appointment.
Availability – When changing this setting, select Custom Hours. This will enable you to specify which days your Parents Evening’s are on and which times they are between.
Assign Staff – Select the staff available to be booked for the Parents Evening (You must have added all of the staff needed to the staff list on the Staff tab), if you don’t assign any staff in particular, all of the staff on the staff list will be available to book.
3. Once you have completed the fields, scroll back to the top of the page and click Save in order to create the service.
Publishing the Booking Page
1. Launch Microsoft Bookings through Office 365.
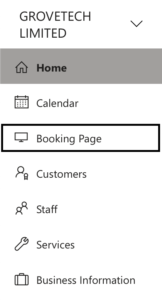
2. On the menu on the left hand side of the screen, select the Booking Page option.
3. Now you will need to decide on a few options in order to create your booking page and make it specific to your organisation:
Booking Page Access Control – There are two options with tick boxes, we highly recommend you keep the first option, Require a Microsoft 365 or Office 365 account from my organisation to book, UNTICKED. This will mean parents without Office 365 will be able to book an appointment with a teacher. The other option with a tick box is, Disable direct search engine indexing of booking page, this needs to be TICKED, as it will mean only people who you want to see the booking page and send it to (parents) will see the booking page and it won’t be searchable on Google.
Customer Data Usage Consent – When selected, text requesting the customer’s consent for your organisation to use their data will appear on the Booking page. The box will have to be checked by the user in order to to complete the booking.
Scheduling Policy – Change the policy to suit the needs of your organisation.

Staff – Tick the box so that Parents can choose the particular staff member to book an appointment with.
Availability – You will need to change the General Availability drop down menu to Custom Hours. This will bring up a table with the days of the week and times, you can now set the times to match those that you’ve set out for the Parents Evening.
4. Once this has been done, scroll back to the top and click, Save and Publish. This will publish your booking page and give you the link to the page that you can then send to parents so they can book an appointment.
5. Once the Parents Evening’s have been completed you can then return to the booking page and select Unpublish from the top taskbar.
Setting up the Appointments
Once staff member’s start to receive bookings they will need to set up the meetings on Microsoft Teams, visit https://kb.grovetech.org/index.php/bwl-knowledge-base/office/kb0106/ to find out how to set up and invite outside parties to a meeting. Once set up, the parent will receive an email confirming the meeting has been set up and at the time of their appointment they will need to join the meeting via that email.
Last Update: October 20, 2020