

Overview
This guide runs through some essential processes that make the MEDI-BOOK system tick.
Logging in for the first time
1. When you are notified that someone has created you a MEDI-BOOK account, you will need to visit edu365.org.uk.
2. Once on the website select, Forgot Password?, enter your email address and click Send.
3. This will send you an email with a link in it to reset your password to whatever is memorable to you!
4. Once you have reset your password, go back onto edu365.org.uk and log into MEDI-BOOK using your email address and your newly reset password.
Adding an accident report
1. First you must login to your MEDI-BOOK account (edu365.org.uk).
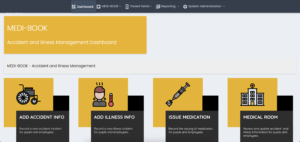
2. Now, faced with the MEDI-BOOK Home Screen, select Add Accident Info (wheelchair icon) from the 8 main clickable buttons displayed on the screen.
3. Next, search for the person involved in the accident using the search bar in the top left of the screen (you can only search one word so either their first name or surname NOT both).
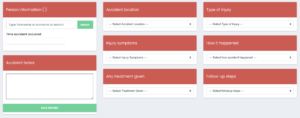
4. Below this, click in the box where it says Time Accident Occurred and use the clock to set the time the accident happened.
5. From here on, the rest of the accident form is simply drop down boxes and selecting the most appropriate option for each category.
6. There is also the option to type out accident notes so the user can add any another specific information not covered by the drop down menu categories.
7. Once complete, click SAVE RECORD (green button).
Adding an accident via mobile (if you haven’t downloaded our app!)
1. Whether your mobile is an Android or IOS device, you will need to go to your browser (Safari or Google Chrome).
2. In the address bar (where you search for websites etc) type in and search edu365.org.uk.
3. This will bring you to the login screen, login with your credentials (email address + password).
4. You will then be faced with the MEDI-BOOK mobile version for adding accidents.
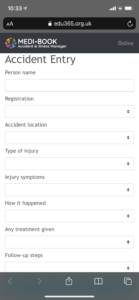
5. Start to type in the name of the person that has had the accident and the search function will find the person and you can select their name and registration group.
6. You will now need to select the details that are most appropriate for the the accident from each of the drop down menus. An example accident report is filled in below.
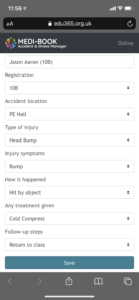
7. When this is completed, click Save at the bottom of the page, the accident report is now saved in the system.
Recording an Accident via mobile when Offline (no WIFI/mobile data)
NOTE – The browser you open the MEDI-BOOK Webapp on MUST NOT be on private browsing, as it won’t save the accident record you input to the cache ready to uploaded when you regain access to data or WIFI.
1. Firstly, you must have access to either WIFI or mobile data in order to load and login to the MEDI-BOOK Webapp.
2. Once successfully logged in, you may now remove yourself from mobile data or WIFI, notice in the top right of the screen it says ONLINE before you remove yourself from mobile data or WIFI.
3. After this is completed, refresh the browser. You may get a message along the lines of “Mobile Data is Turned Off“, select OK on this message and refresh again.
4. You will notice in the top right of the screen where it previously said ONLINE, now says OFFLINE, this is how you know you can input an accident record whilst without mobile data or WIFI.
5. You can now use the drop down menus to record the incident. When inputting the name of the person involved, you will notice that you have to type the name out fully as the search feature is disabled when you’re offline.
6. Once completed, select Save. The message Accident Successfully Saved will appear in a green box.
7. Next, you MUST close down the browser page and return to your Home Screen.
8. Now, when you are able to, reconnect to WIFI/mobile data.
9. When you have reconnected to WIFI/mobile data, reload the MEDI-BOOK WebApp using your browser.
10. Once loaded and you have logged in, a message will appear saying “Sync Successfully Completed” followed by the number of accidents uploaded.
11. When you see this message, it means that the record has been uploaded to the Offline Accident Management area, you will now have to follow the below instructions on how to reach this area.
Matching an offline accident record
1. First you must login to your MEDI-BOOK account, this account must have Administrator privileges.
2. Select MEDI-BOOK from the bar at the top of the screen.
3. Now, select the Accident Management menu.
4. Followed by Offline Accident Management.
5. Now you will have the Offline Accident Management menu on the screen.
6. You will see any records that have been recorded with the MEDI-BOOK WebApp on the screen, the next and final step is matching them with the person’s profile so they can be viewed just like any other record.
7. In order for you to match the record, you must select the drop down menu for either, the class list or the full list of every pupil in the school, and then locate the pupil that the record is for.
8. Next, you must select the pupil.
9. Now, once selected, click Save, followed by OK.
10. You will see the message, Record successfully saved, appear on screen, this notifies you that you have matched the record correctly and it has been added to the pupils history of accidents.
Updating an accident report with extra notes
1. From the MEDI-BOOK Home Screen, select Medical Room (hospital icon) from the 8 main clickable buttons displayed on the screen.
2. Once Medical Room has been clicked, you will be taken to the screen below.
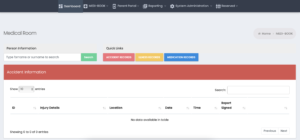
3. From here, you will want to go to the search bar in the top left of the screen (you can only search one word so either their first name or surname NOT both) and search for the student who’s accident report you want to update with extra notes. Select the student by clicking select next to their name. You will know the person has been selected as their historical reports will appear and their name will be visible next to the Medical Room title above the search bar.
4. The page will then appear (like below) with all of the student’s historical accident reports.
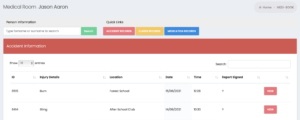
5. You should now click view, next to the report you want to add the notes on.
6. When clicked, the report will show as a new menu and there will be clickable buttons along the bottom.
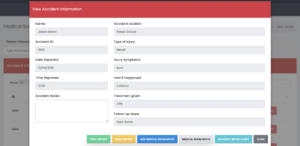
7. Next, click the dark blue button, Add Medical Room Notes.
8. This will bring you to the screen where you can add any extra information or treatment given that wasn’t covered by the first report, including adding a photo of anything that is sent as necessary.
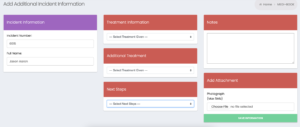
9. Once completed, click Save Information, and the extra notes will be added to the report.
Printing/adding an accident a report to the email queue
There are two methods do to either of these actions, one using the Medical Room and the other using the reporting menus.
Reporting Method
1. From the MEDI-BOOK Home Screen, select Reporting on the main taskbar across the top of the screen, followed by MEDI-BOOK and then Accident Book Reports.
2. Now select the first report on the screen, Accident Activity.
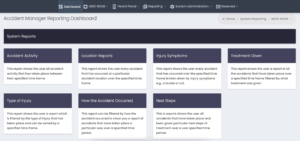
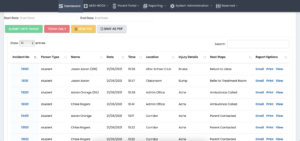
3. This is where you can filter by dates to find the report/s you’re looking for or if you just need to today’s reports, select the TODAY ONLY button.

4. Once you have either filtered using the date range or today only button, any reports will appear on screen. Next to each report will be three buttons, Email, Print, View. The email button is the one you’ll need to click in order to send that report to the email queue, and the print button will enable you to print that particular report.
Medical Room Method
1. From the MEDI-BOOK Home Screen, select Medical Room (hospital icon) from the 8 main clickable buttons displayed on the screen.
2. Once Medical Room has been clicked, you will be taken to the screen below.
3. From here, you will want to go to the search bar in the top left of the screen (you can only search one word so either their first name or surname NOT both) and search for the student who’s accident report you want to add to the email queue or print off a copy of. Select the student by clicking select next to their name. You will know the person has been selected as their historical reports will appear and their name will be visible next to the Medical Room title above the search bar.
4. The page will then appear (like below) with all of the student’s historical accident reports.
5. You should now click view, next to the report you want to add to the email queue or print.
6. When clicked, the report will show as a new menu and there will be clickable buttons along the bottom.
7. Next, click the green blue button, Print Report, in order to print the selected report. Or click the yellow button, Email Report, in order to add the selected report to the email queue.
Last Update: October 20, 2021