

Overview
Instructions for the secure Barracuda VPN
If you have purchased either GROVETECH Firewall or Firewall and Internet services, secure remote access to your local network comes as standard.
Accessing the internal network depends on permissions to the local network. If only Firewall services were purchased additional configuration will be required. Please contact your IT support and ask them to contact Grovetech support for further information.
If you purchased both Firewall and Internet services from GROVETECH, please continue.
Procedure
Installing the VPN software
Run application NetworkAccessClient_n.n.n-nn_x64.exe (n = version number)
- Click Next.
- Click Accept Terms.
- Click Next, when asked.
- Click Install, when asked.
- After installation, click the Finish button.
From the Windows Start Menu, Click Barracuda Network Access Client, the client will open:
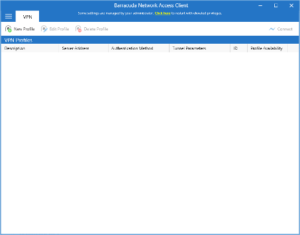
If you get the message, Some settings are managed by your administrator, with a yellow Click Here link, press the link, the app will restart and may ask you for your PC’s admin login.
Type in your school network ID (just as you would to log on when on site) and Password if asked and select Yes when asked. If this does not work please contact GROVETECH support for further help.
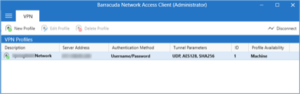
- Click New Profile.
- Click Machine.
- For Description type (Name of site) Network e.g. GROVETECH Network.
- For Server Address type in the IP address supplied by GROVETECH support.
- Leave everything else as default.
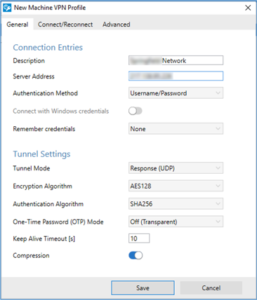
- Click the Save button.
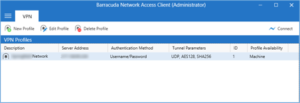
You have now created the connection profile to connect to the server:
Connecting to your network
- Click the connection line so it is highlighted.
- Near top right of this window click Connect.
- The Barracuda VPN client will appear.
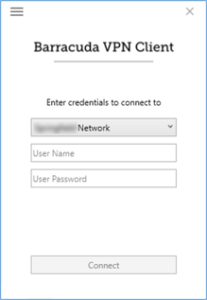
- Type in the Username and Password you were given.
- Click Connect.
- If requested, click yes to accept the certificate.
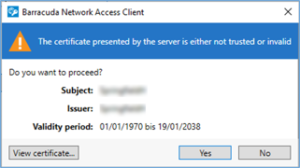
- As the certificate needed to be installed for the first time, the connection may initially fail so click Retry.
- If you are running Windows 10 you may get a request to see everything on this new network, click Yes.
You will now be connected to the network, you can click the X to close the connection window, it will not disconnect you.
Connecting to school shares
If your laptop is a school laptop, it should already have been configured to allow you to see and connect to the VPN and network shares.
If your PC is your own, connection depends on the version of Windows you have.
To connect to the network share:
- Open file explorer.
- Type in \\{server name}\share – this is school specific, please contact GROVETECH support and say what site you are from and what shares are required.
- A dialog will appear, type in your site network ID and password just as you would when logging into your PC on site.
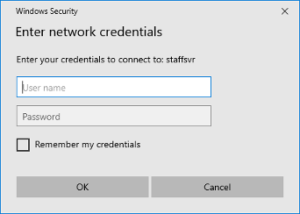
Click the option to remember my credentials if you trust the PC you are on and are the only one using it, otherwise leave this unchecked so you have to give your details each time you connect.
You will now be connected. Please be advised that Network security has been enforced, you cannot see or connect to shares you are not allowed to see on site.
If you are running Windows 10 Home, you may not be able to connect. This depends on the version of Windows Home in use, the network connection software will not be installed in Windows as it is not needed for home use. If this is the case, you will not be able to connect using the VPN directly to network shares. Please contact GROVETECH Support for further advice.
Disconnecting from the network
- Select Barracuda Network Access Client if you’ve closed it or tap its icon on the taskbar if its still open.
- Click the connection to highlight it.
- Click Disconnect in the top right.
- You are now disconnected from the network.
Last Update: August 10, 2020